
Monday, 16 April 2012
A guide - How to make the webpage loads faster?
1. Minimizing HTTP Requests:
Suppose you have these Javascripts
<script type="text/javascript" src="http://www.example.com/menu.js"></script>
<script type="text/javascript" src="http://www.example.com/ajax.js"></script>
<script type="text/javascript" src="http://www.example.com/nav.js"></script>
<script type="text/javascript" src="http://www.example.com/tools.js"></script>
<script type="text/javascript" src="http://www.example.com/footer.js"></script>
<script type="text/javascript" src="http://www.example.com/others.js"></script>
Lets combine all of them into a single Javascript:
<script type="text/javascript" src="http://www.example.com/combined-all.js">
</script>
This way you will reduce the number of HTTP requests to the server and help the page to load faster.
2. CSS Sprites: These are used to reduce the number of HTTP Requests for images on a web page. In this process, a developer combines all images into a single image and use the CSS background-image and background-position properties to then display the desired image segment.
3. Specify image dimensions: Specifying the height and width attributes for all the images helps web browsers render web pages faster, as the web browser is not forced to spend time unnecessarily on calculating the height and width of image(s) and can instead use this time to render other elements of the web page.
Example: This is the sample CSS code:
Browser Caching: For all static resources set “Expires header” to a minimum of one month, and preferably up to one year.Use expires header for all static resources like image(s), script(s), CSS, PDF, Flash etc. (HTML is not static, and shouldn't be considered cacheable)
Suppose you have these Javascripts
<script type="text/javascript" src="http://www.example.com/menu.js"></script>
<script type="text/javascript" src="http://www.example.com/ajax.js"></script>
<script type="text/javascript" src="http://www.example.com/nav.js"></script>
<script type="text/javascript" src="http://www.example.com/tools.js"></script>
<script type="text/javascript" src="http://www.example.com/footer.js"></script>
<script type="text/javascript" src="http://www.example.com/others.js"></script>
Lets combine all of them into a single Javascript:
<script type="text/javascript" src="http://www.example.com/combined-all.js">
</script>
This way you will reduce the number of HTTP requests to the server and help the page to load faster.
2. CSS Sprites: These are used to reduce the number of HTTP Requests for images on a web page. In this process, a developer combines all images into a single image and use the CSS background-image and background-position properties to then display the desired image segment.
3. Specify image dimensions: Specifying the height and width attributes for all the images helps web browsers render web pages faster, as the web browser is not forced to spend time unnecessarily on calculating the height and width of image(s) and can instead use this time to render other elements of the web page.
Example: Instead of coding image(s) like this:
<img src="http://www.example.com/logo.jpg" />
Always code image tags with height and width attributes, like this:
<img src="http://www.example.com/logo.jpg" width="250" height="100"
alt="Unique and relevant keyword(s)" />
4. Place CSS tags first in source code, before Java Script tags:
Example: Let's say you have 3 stylesheets and 2 Java Scripts and you specify them in the following order in the document (inside <HEAD> tags).
<head>
<link rel="stylesheet" type="text/css" href="stylesheet1.css" />
<script type="text/javascript" src="scriptfile1.js" />
<script type="text/javascript" src="scriptfile2.js" />
<link rel="stylesheet" type="text/css" href="stylesheet2.css" />
<link rel="stylesheet" type="text/css" href="stylesheet3.css" />
</head>
The second two stylesheets must wait until the two java script files are finished downloading. The total download time equals (in this case 100 ms + 100 ms + 100 ms = 300 ms).
Now we will change the order of the CSS and Java Script resources to this:
<head>
<link rel="stylesheet" type="text/css" href="stylesheet1.css" />
<link rel="stylesheet" type="text/css" href="stylesheet2.css" />
<link rel="stylesheet" type="text/css" href="stylesheet3.css" />
<script type="text/javascript" src="scriptfile1.js" />
<script type="text/javascript" src="scriptfile2.js" />
</head>
Minify CSS (GZIP): This is the process of removing unnecessary characters from CSS code to reduce the file size, thereby improving load times. To minify CSS code, all comments and unneeded white space characters (space, newline, and tab) are removed.
/* This is a unwanted comment */

h1{
 font-size: 18px;
 font-family: arial, helvetica, sans-serif;
 color: #FF0000;
}

/* unwanted comments comments comments */

p{
 font-size: 12px;
 font-family: arial, helvetica, sans-serif;
 color: #000000;
}
h1{font-size:18px;font-family:arial, helvetica, sans-serif;color: #FF0000;}
p{font-size:12px;font-family:arial, helvetica, sans-serif;color: #000000;}
Optimize Java Scripts
Java Scripts can be optimized the same way we optimize CSS. (see Minify CSS above)- Combine all your external Java Script files.
- Put Java Script tags after CSS tags.
- Minify Java Script (GZIP).
- Remove Duplicate Scripts.
Browser Caching: For all static resources set “Expires header” to a minimum of one month, and preferably up to one year.Use expires header for all static resources like image(s), script(s), CSS, PDF, Flash etc. (HTML is not static, and shouldn't be considered cacheable)
List of HTTP response code
1xx Info / Informational
HTTP_INFO - Request received, continuing process.
Indicates a provisional response, consisting only of the Status-Line and optional headers, and is terminated by an empty line.
- 100 Continue - HTTP_CONTINUE
- 101 Switching Protocols - HTTP_SWITCHING_PROTOCOLS
- 102 Processing - HTTP_PROCESSING
2xx Success / OK
HTTP_SUCCESS - The action was successfully received, understood, and accepted.
Indicates that the client’s request was successfully received, understood, and accepted.
- 200 OK - HTTP_OK
- 201 Created - HTTP_CREATED
- 202 Accepted - HTTP_ACCEPTED
- 203 Non-Authoritative Information - HTTP_NON_AUTHORITATIVE
- 204 No Content - HTTP_NO_CONTENT
- 205 Reset Content - HTTP_RESET_CONTENT
- 206 Partial Content - HTTP_PARTIAL_CONTENT
- 207 Multi-Status - HTTP_MULTI_STATUS
3xx Redirect
HTTP_REDIRECT - The client must take additional action to complete the request.
Indicates that further action needs to be taken by the user-agent in order to fulfill the request. The action required may be carried out by the user agent without interaction with the user if and only if the method used in the second request is GET or HEAD. A user agent should not automatically redirect a request more than 5 times, since such redirections usually indicate an infinite loop.
- 300 Multiple Choices - HTTP_MULTIPLE_CHOICES
- 301 Moved Permanently - HTTP_MOVED_PERMANENTLY
- 302 Found - HTTP_MOVED_TEMPORARILY
- 303 See Other - HTTP_SEE_OTHER
- 304 Not Modified - HTTP_NOT_MODIFIED
- 305 Use Proxy - HTTP_USE_PROXY
- 306 unused - UNUSED
- 307 Temporary Redirect - HTTP_TEMPORARY_REDIRECT
4xx Client Error
HTTP_CLIENT_ERROR - The request contains bad syntax or cannot be fulfilled.
Indicates case where client seems to have erred. Except when responding to a HEAD request, the server should include an entity containing an explanation of the error situation, and whether it is a temporary or permanent condition.
- 400 Bad Request - HTTP_BAD_REQUEST
- 401 Authorization Required - HTTP_UNAUTHORIZED
- 402 Payment Required - HTTP_PAYMENT_REQUIRED
- 403 Forbidden - HTTP_FORBIDDEN
- 404 Not Found - HTTP_NOT_FOUND
- 405 Method Not Allowed - HTTP_METHOD_NOT_ALLOWED
- 406 Not Acceptable - HTTP_NOT_ACCEPTABLE
- 407 Proxy Authentication Required - HTTP_PROXY_AUTHENTICATION_REQUIRED
- 408 Request Time-out - HTTP_REQUEST_TIME_OUT
- 409 Conflict - HTTP_CONFLICT
- 410 Gone - HTTP_GONE
- 411 Length Required - HTTP_LENGTH_REQUIRED
- 412 Precondition Failed - HTTP_PRECONDITION_FAILED
- 413 Request Entity Too Large - HTTP_REQUEST_ENTITY_TOO_LARGE
- 414 Request-URI Too Large - HTTP_REQUEST_URI_TOO_LARGE
- 415 Unsupported Media Type - HTTP_UNSUPPORTED_MEDIA_TYPE
- 416 Requested Range Not Satisfiable - HTTP_RANGE_NOT_SATISFIABLE
- 417 Expectation Failed - HTTP_EXPECTATION_FAILED
- 418 unused - UNUSED
- 419 unused - UNUSED
- 420 unused - UNUSED
- 421 unused - UNUSED
- 422 Unprocessable Entity - HTTP_UNPROCESSABLE_ENTITY
- 423 Locked - HTTP_LOCKED
- 424 Failed Dependency - HTTP_FAILED_DEPENDENCY
- 425 No code - HTTP_NO_CODE
- 426 Upgrade Required - HTTP_UPGRADE_REQUIRED
5xx Server Error
HTTP_SERVER_ERROR - The server failed to fulfill an apparently valid request.
Indicate cases in which the server is aware that it has erred or is incapable of performing the request. Except when responding to a HEAD request, the server should include an entity containing an explanation of the error situation, and whether it is a temporary or permanent condition. User agents should display any included entity to the user. These response codes are applicable to any request method.
- 500 Internal Server Error - HTTP_INTERNAL_SERVER_ERROR
- 501 Method Not Implemented - HTTP_NOT_IMPLEMENTED
- 502 Bad Gateway - HTTP_BAD_GATEWAY
- 503 Service Temporarily Unavailable - HTTP_SERVICE_UNAVAILABLE
- 504 Gateway Time-out - HTTP_GATEWAY_TIME_OUT
- 505 HTTP Version Not Supported - HTTP_VERSION_NOT_SUPPORTED
- 506 Variant Also Negotiates - HTTP_VARIANT_ALSO_VARIES
- 507 Insufficient Storage - HTTP_INSUFFICIENT_STORAGE
- 508 unused - UNUSED
- 509 unused - UNUSED
- 510 Not Extended - HTTP_NOT_EXTENDED
Friday, 13 April 2012
Thursday, 12 April 2012
Tutorial: How to extract ALL URLs directly into excel
Lets take an example of www.crmdomain.com. We need to extract all the URLs from this website including the orphanaged ones .
Step 1: Open the excel and go to the Data tab. Click on Data >From Other Sources >From XML Data Import


So now you can directly import the URLs in your excel sheet and share it with your colleagues/ clients etc.
Step 1: Open the excel and go to the Data tab. Click on Data >From Other Sources >From XML Data Import

Step 2: When it open , put the complete URL and click OPEN

Step 3: When you click open, it will connect to the server and after this it will ask you few things, just click OK and here you are:

Wednesday, 11 April 2012
Enhance your website's reach by implementing Social Plugins
Social plugins let you see what your friends have liked, commented on or shared on sites across the web.

The Like button lets users share pages from your site back to their Facebook profile with one click.
|

The Subscribe button allows people to subscribe to other Facebook users directly from your site.
|

The Activity Feed plugin shows users what their friends are doing on your site through likes and comments.
|

The Recommendations plugin gives users personalized suggestions for pages on your site they might like.
|

The Like Box enables users to like your Facebook Page and view its stream directly from your website.
|

The Login Button shows profile pictures of the user's friends who have already signed up for your site in addition to a login button.
|

The registration plugin allows users to easily sign up for your website with their Facebook account.
|

The Facepile plugin displays the Facebook profile pictures of users who have liked your page or have signed up for your site.
|

The Live Stream plugin lets your users share activity and comments in real-time as they interact during a live event.
|


A Visual guide- How to create Custom tabs for New facebook Timeline
Step 1 – Install Static iFrame Tab App
Click on this link and install the Static iFrame Tab App just click on Install Page Tab.

Step 2 – Configure the Static iFrame Tab App Edit the favorite by clicking on it, after clicking on it authorize the tab applications.

Step 3: You will get this screen, start choosing the fields that you need

Now here are the things you can do with :
Starting with the first:
1. Enable Timeline 810px Wide Mode (New!): You can enable or disable it
2. Tab Image : This will help you in choosing the image for the tab
3. Page Source: This will help you to load the information in the iFrame (when someone clicks the tab the iFrame opens, so select the proper radio button and the relevant information will appear)
URL Redirect Image HTML
URL: If you enter a URL , this will open that webapge/microsite in the iFrame
Redirect: The user's entire browser window will leave your page tab and be redirected to the URL you specify

This is how your new tab will look like on FB.

Now keep on adding as many tabs as you like (Total of 12 tabs including one Photo tab which cannot be repositioned or displaced from its original position)
Click on this link and install the Static iFrame Tab App just click on Install Page Tab.

Step 2 – Configure the Static iFrame Tab App Edit the favorite by clicking on it, after clicking on it authorize the tab applications.

Step 3: You will get this screen, start choosing the fields that you need


Now here are the things you can do with :
Starting with the first:
1. Enable Timeline 810px Wide Mode (New!): You can enable or disable it
2. Tab Image : This will help you in choosing the image for the tab
3. Page Source: This will help you to load the information in the iFrame (when someone clicks the tab the iFrame opens, so select the proper radio button and the relevant information will appear)
URL Redirect Image HTML
URL: If you enter a URL , this will open that webapge/microsite in the iFrame
Redirect: The user's entire browser window will leave your page tab and be redirected to the URL you specify
Image : Select an image to upload (max size: 810px wide by 1200px tall, 400kb)
HTML: You can simply paste the text over here with an option of modifying of changing the font size, colour, style etc
4. Friend-Gate :Three options:
Off Default HTML
Off :Friend-gate is turned off. Visitor's friends do not need to be fans to access your content.
Default :
Number of friends who must like this page:
(1-100)
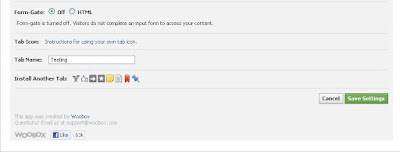
5. Form-Gate: 2 options Off HTML
Off : Form-gate is turned off. Visitors do not complete an input form to access your content.

Now keep on adding as many tabs as you like (Total of 12 tabs including one Photo tab which cannot be repositioned or displaced from its original position)
Tuesday, 10 April 2012


Tutorial on How to Optimize Facebook Timeline- Visually
According to the new Facebook Timeline, there are 5 areas where you can visually optimize the timeline for a better visual effect. They are as follows:

2. Lets talk about 'The Profile Picture'
Although the profile picture is displayed at 125 x 125 pixels, Facebook requires that the image you upload be 180 x 180 pixels, which it then resizes. And, of course, make sure your profile picture graphic is a square.
3: Custom Tab Images
This is a new initiative from the FB wherein the tabs has been moved from left and is place on the top just below the cover pic.
What is changed here?
(i)The old 16*16 pixel icons in the tab has been replaced by 111*74
(iii) Name of the tab will be below the respective tab
(iv) The Photo tab cannot be replaced, it is fixed. You can play with the other 3 tabs
(v) If you use lesser tabs, say only 2 tabs then the Info tab occupies the remainign area
(vi) You can create your own graphics for any custom tab images EXCEPT Facebook’s own apps (Photos, Notes, Events, Videos, Links).
6. Images
Maximize the images you post regularly - they will display as 404 x 404 pixels.
1. Cover photo
2. Profile picture
3. Custom tab images
4. Highlighting posts
5. Milestones
Here are the sizes along with the sample:
Cover Photo: 851*315 px
Profile Picture: 125*125px
Custome Tab images: 111*74px

1. Now lets start with the Cover Photo
What you should do?
- Use a unique image that represents your page.
- Be creative and Experiment a lot of things
- Use the cover photo to bring a strong visual impact to your page by extending your brand with lifestyle imagery, product images or a description of your services.
What you should not do?
§ No promotions, coupons or advertisements
§ It shouldn’t be primarily text-based or
infringe on anyone else’s copyright
§ No price or purchase information, such as “40%
off” or “Download it at our website”
§ No contact information, such as web address,
email, mailing address or other information intended for your page’s About
section
§ No references to user interface elements, such
as Like or Share, or any other Facebook site features
§ No calls to action, such as “Get it now” or
“Tell your friends”
(ii) Maximum of 4 tabs can be displayed prominently including the 'Photo tab'
4. Highlighting
You can use the Highlight' feature to create Visual differentiation. When you highlight a page status, it then occupies two columns in your Timeline.
5. Milestones (843 x 403)
Brands can create Milestones—incorporating pictures and text—for various significant events in their histories. Milestones can be used to visually organize the content and keep users on the Page with great archival photos.
6. Images
Maximize the images you post regularly - they will display as 404 x 404 pixels.

Monday, 2 April 2012
Fantastic Campaign by Red Bull (Energy Drink) based on Corporate Chamchas :)
According to AFAQS
"The campaign, designed around the thought 'Why climb the career ladder, when you can fly!' is currently active on social media platforms such as Facebook and YouTube and showcases how the energy drink can enhance performance at work.
Energy drink Red Bull has launched a campaign to appeal to the ambitious streak of people who want to climb the corporate ladder through performance. It poses Red Bull as a drink that helps them to reach this goal, as the active ingredients in it enable one to give peak performance and thus rise to the top. The essence of the entire campaign is captured in the line: 'Why climb the career ladder when you can fly!'.
The campaign, which has a strong focus on the digital medium, is a tongue-in-cheek take on the Indian corporate culture, where a corporate 'chamcha' is ready to do anything to climb the career ladder. As part of the campaign, Red Bull has launched a viral video on YouTube. Titled 'Corporate Chamcha', the film shows how ridiculous it is to be a 'chamcha' and presents an alternate way to reach the top.
The insight of the idea is that drinking Red Bull keeps one sharp and enhances performance, so one need not be a 'chamcha' to be professionally successful. The film has been made by Delhi-based agency, The Brewhouse."
Here are few screenshots:
Redull has created a subdomain and hosted it here
This is how the Homepage looks like

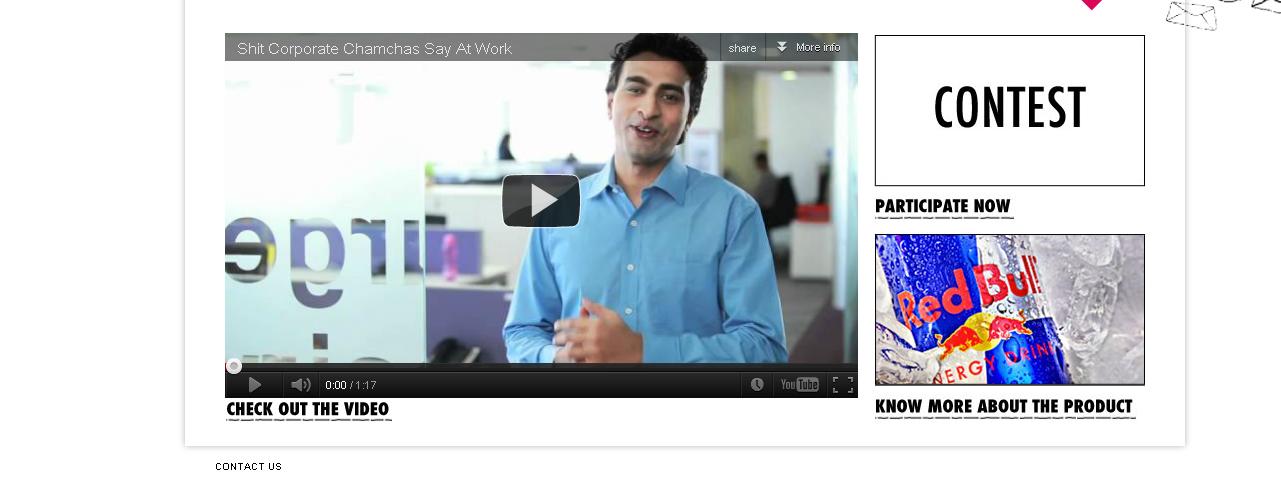
Click on start and this screens opens up which guides you ..

You are given a task to perform

When you click 'Start' the game starts

Game Ends with some information(Passed/Fail) with comments

Cheers
Subscribe to:
Posts (Atom)