Choose the correct profile, then click on the “Filters” tab


Within the Filters tab, click the “+New Filter” button. This is where you’re going to enter the details you’ve collected during your diligence above.
Now, there are quite a few ways to exclude or include data here. The simplest way is excluding by IP address. You can also see there are ways to set up profiles that only include data from certain referrers, or data from subdirectories on the site.
You’d use this in a separate profile that only tracked that data, that’s a discussion for another time. For today’s exercise, we’re going to exclude traffic by IP address.
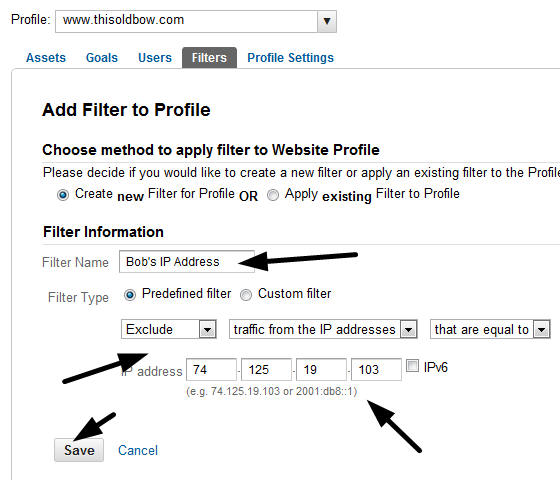
Make sure you name each filter something descriptive.
“In Office IP” or “Bob’s at home IP” you want it to be easy to make changes in the future if someone changes their ISP or is no longer employed by the company. Fill in the information and save each filter. Every IP address needs a different filter, so this could take some time to set up, but you’ll see a difference when you’re looking at honest data when you’re done.
The next thing I’d do is add an annotation to your data graph to remind anyone who looks at the data that employee & contractor IPs were removed on a specific date. This is really easy, a few clicks from the analytics homepage and you’re done.
Underneath the graph on your “My Site” Tab in the orange bar, click the down arrow.

Click “Create new annotation”
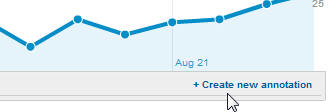
Then enter the date, your note, and click save

You can now see the annotation in the graphic, and you can see how excluding the IP address affected all of your data.

No comments:
Post a Comment